
How to change blog author name on blogger:
To change blog author name, we can use three methods
- Changing profile name
- Creating Custom Author Name
- Edit HTML method

Changing Blog Profile Name:
In blogger blog profile name is a default author name. The default author name is directly set from google plus. To change blog profile Name, follow these steps as given below
Related Posts
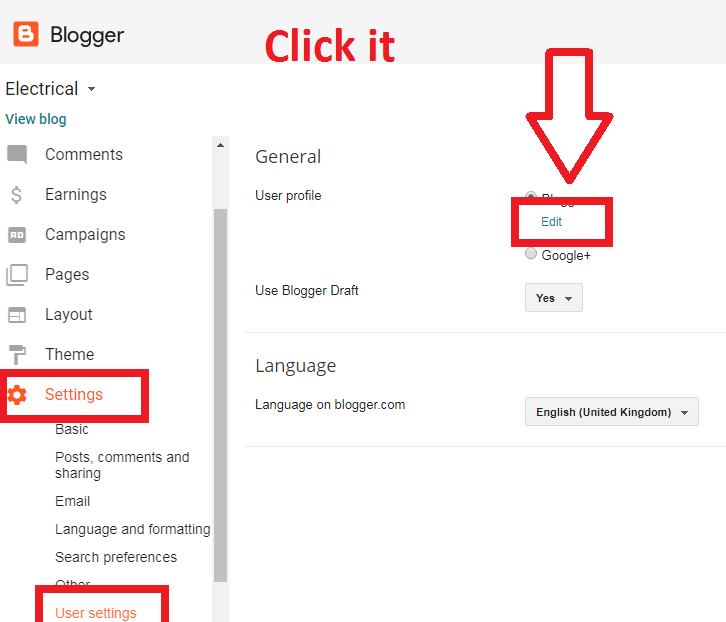
Step1: Login to your blogger dashboard.
Step2: Go to setting
Step3: Go to user setting
Step4: Select blogger
Step5: Click edit
Step6: There you see “Display Name”
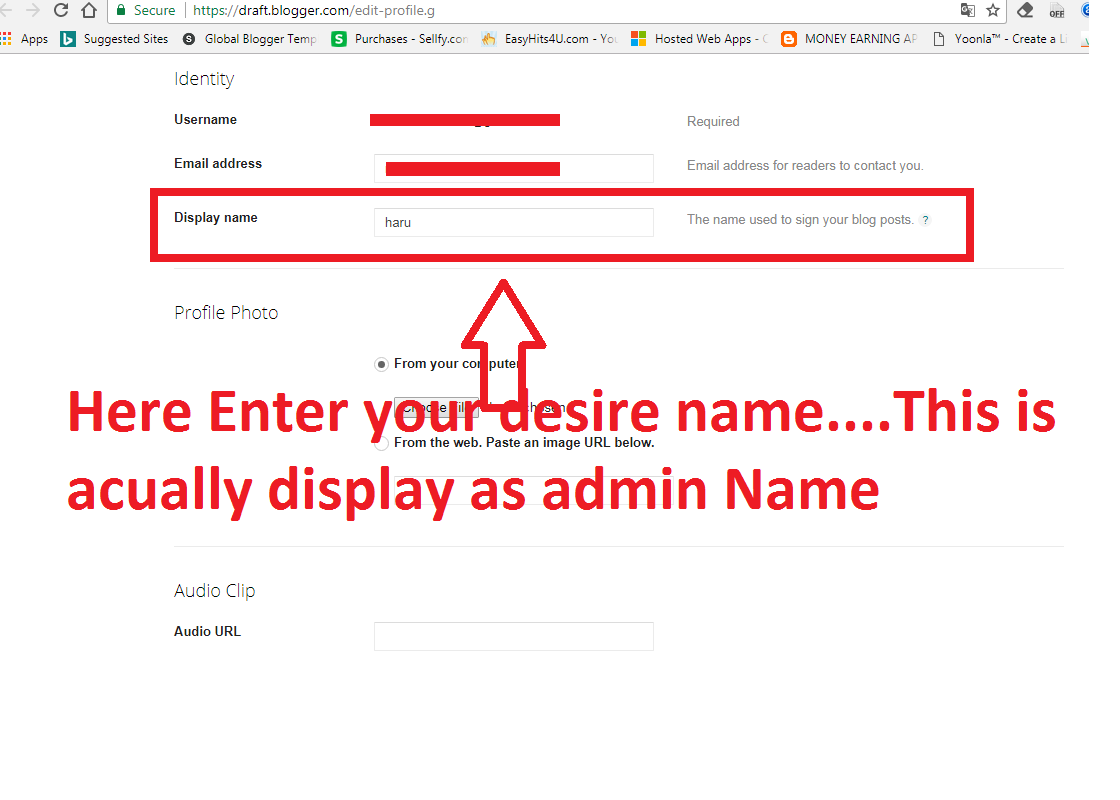
Step7: There you enter yours desire name to be displayed.
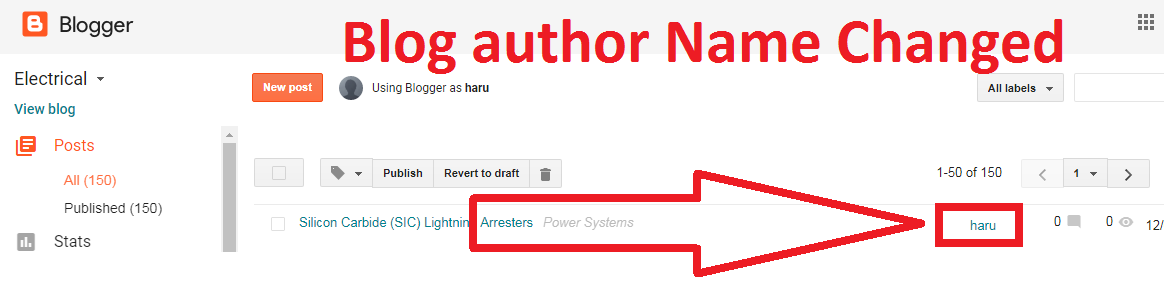
Step8: click Save at the downside
Step9: That’s all you Have done it.
- Creating Custom Author Name
For free premium template, you will get separate author box, below of your blog post. In this you can add your profile picture, your bio etc. Also you can add your social media links.
Let’s see…
Step1: Login to your blogger dash board.
Step2: Go to layout
Step3: Go to author box
Step4: Click edit
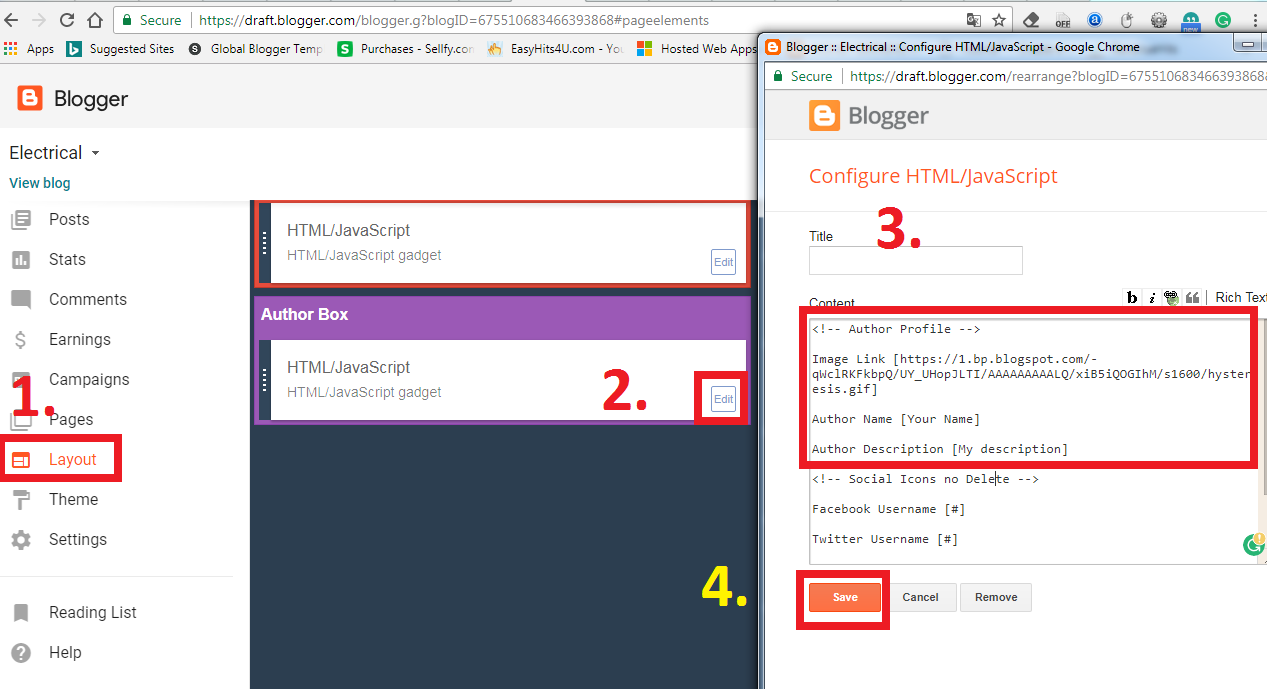
Step5: Edit or Change author name and Add your description
Step6: Add Image URL
Also See: How to create Image URL
Note: the image URL should be in png or jpg or jpeg or gif format
Step6: Save it

That’s all you have done it
Also see This:
How to create Awesome Blog in Blogger.com
How to hide author Name in blogger post with simple steps
How to Delete your blogger blog permanently
How to Change Author photo in blogger for premium template
3 Simple Way to change blog author name on blogger
How to Create Image URL in png or Jpg or gif format
How to Change Admin Name in Blogger
How add Menu and Submenu in blogger
How to change theme of your blog in blogger
How to Edit about me on blogger
How to change profile picture on blogger with Pictured Explanation
How to Create pages in Blogger with 7 steps
-
Edit HTML method
Step 1: Go to your blogger dashboard.
Step 2: Click on Template.
Step 3: Click on Edit HTML and click inside the box.
Step 4: Press Ctrl+F to search for <data:post.author/>.
<data:post.author/> – This is the author name.
Step 5: Change <data:post.author/> into something else like Admin.
Search for all the <data:post.author/> you can find and change all of them into the name you want to display in your blog. Congratulations! well done! do not forget to save your work by clicking the Save Template button on the upper left of the box.
Second: Change or Remove the redirect link when clicking the Author’s Name.
After searching for <data:post.author/>.
if you can see <a href=”Redirect Site”> <data:post.author/> </a> something like this.
then let us continue.
Remove Redirect Link:
Step 1: Remove or Delete <a href=”Redirect Site”> </a> and remain the <data:post.author/> or the Author Name.
Step 2: Save Template! and check it. you can’t click the Author Name.
Change Redirect Link:
Step 1: Change the Redirect Site into the site where you want to Redirect whenever clicking the Author’s Name.
Step 2: Save Template! and check it. When clicking the Author’s Name Will Redirect into the Page you put

")

")

")
")
")


")

")

")